You're viewing documentation for the legacy version of Firezone, now End-of-Life. View the latest docs here.
Install Firezone with Omnibus
Due to Omnibus being EOL'd by Chef in 2024, Docker is now the preferred method of deploying Firezone. See the Docker deployment guide to get started. Read below to continue with an Omnibus-based deployment.
Firezone can be deployed on a server running a supported Linux distribution in a few minutes with our Debian or Red Hat package. This guide will walk you through the steps to get started.
Step 1: Prerequisites
- Ensure you're on a supported Linux distribution. A kernel upgrade may be required to ensure WireGuard® is available.
- Ensure port forwarding is enabled on your firewall. The default Firezone
configuration requires the following ports to be open:
80/tcp(optional): For automatically issuing SSL certificates.443/tcp: To access the web UI.51820/udp: VPN traffic listen port.
Before deploying Firezone in production, you'll need a valid DNS record pointing to this instance. See Prepare to deploy if you haven't done this already.
Firezone modifies the kernel netfilter and routing tables. Other programs that modify the Linux routing table or firewall may interfere with Firezone’s operation. For help troubleshooting connectivity issues, see the troubleshooting guide
Step 2: Install server
After prerequisites are satisfied, you're ready to install the Firezone Server.
Option 1: Automatic install
The easiest way to get started using Firezone is via the automatic installation script below.
sudo -E bash -c "$(curl -fsSL https://github.com/firezone/firezone/raw/legacy/scripts/omnibus_install.sh)"
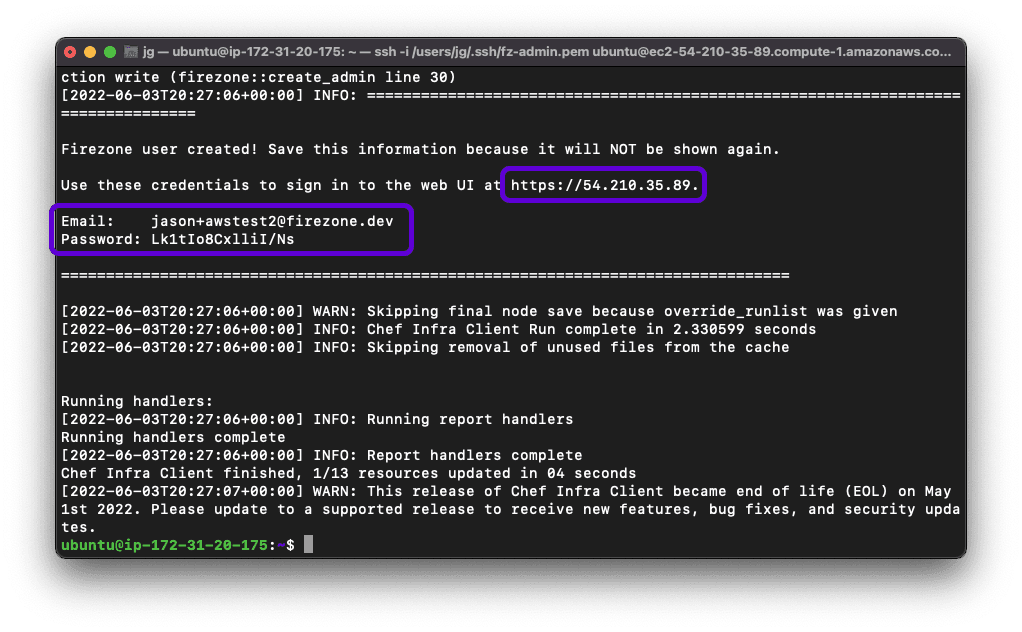
This will ask you a few questions regarding your install, install the latest release for your platform, create an administrator user, then print to the console instructions for logging in to the web UI.

By default, the web UI can be reached at the IP or domain name of your server.
You can regenerate the admin credentials using the
firezone-ctl create-or-reset-admin command.
Option 2: Install from our Debian or RedHat repositories
If the automatic install script fails, try these steps to install Firezone from our Cloudsmith repository.
-
Install WireGuard for your distro. If using Linux kernel 5.6 or higher, skip this step.
-
Install our package repository for your distro's package format:
-
deb packages:
curl -1sLf \
  'https://dl.cloudsmith.io/public/firezone/firezone/setup.deb.sh' \
  | sudo -E bash
See the Debian setup docs for more options if the script fails to setup the repo.
-
rpm packages:
curl -1sLf \
  'https://dl.cloudsmith.io/public/firezone/firezone/setup.rpm.sh' \
  | sudo -E bash
See the RedHat setup docs for more options if the script fails to setup the repo.
-
-
Install Firezone with your distro's package manager:
# Using apt sudo apt install firezone # Using dnf sudo dnf install firezone # Using yum sudo yum install firezone # Using zypper sudo zypper install firezone -
Follow the bootstrap instructions to setup Firezone.
Option 3: Manual install
If all else fails, try these steps to install Firezone manually.
- Install WireGuard for your distro. If using Linux kernel 5.6 or higher, skip this step.
- Download the relevant package for your distribution from the releases page.
- Install with
sudo rpm -i firezone*.rpmorsudo dpkg -i firezone*.debdepending on your distro. - Follow the bootstrap instructions to setup Firezone.
Bootstrap Firezone
-
Bootstrap the application with
sudo firezone-ctl reconfigure. This will initialize config files, set up needed services and generate the default configuration. -
Edit the default configuration located at
/etc/firezone/firezone.rb. We've chosen sensible defaults that should be a good starting point for most installations. For production installations, you'll want to specify a valid external URL and enable ACME for certificate issuance and renewal:# Auto-generated based on the server's hostname. # Set this to the URL used to access the Firezone Web UI. default['firezone']['external_url'] = 'https://firezone.example.com' # Set the email that will be used for the issued certificates and certifications. default['firezone']['ssl']['email_address'] = 'your@email.com' # Enable ACME renewal default['firezone']['ssl']['acme']['enabled'] = trueSee the complete configuration file reference for more details .
-
Reconfigure the application to pick up the new changes:
sudo firezone-ctl reconfigure. -
Finally, create an admin user with
sudo firezone-ctl create-or-reset-admin. The login credentials will be printed to the console output. -
Now you should be able to sign in to the web UI at the URL you specified in step 5 above, e.g.
https://firezone.example.com
Find solutions to common issues during deployment in Troubleshoot .
Step 3: Install client apps
Once successfully deployed, users and devices can be added to connect to the VPN server:
- Add Users: Add users to grant them access to your network.
- Client Instructions: Instructions to establish a VPN session.
Need additional help?
Try asking on one of our community-powered support channels:
- Discussion forums: Ask questions, report bugs, and suggest features.
- Public Slack group: join discussions, meet other users, and meet the contributors
Post setup
Congrats! You have completed the setup, but there's a lot more you can do with Firezone:
- Integrate your identity provider for authenticating clients
- Using Firezone to establish a static IP
- Create tunnels between multiple peers with reverse tunnels
- Only route certain traffic through Firezone with split tunneling
Support us by:
- Starring our repo on Github
- Following us on X at @firezonehq
- Following us on LinkedIn at @firezonehq